


| To
show how simple using PowerGroups™ really is, we'll
demonstrate how to perform two of the many options available:
Confirm A Meeting
and Create A Document. |
||
|
|
||
| A.
Click on the Documents Tool Tab Then choose Create from the Document Options. Select a Document Template from the templates page, in this case a Picture Document. |
 |
|
|
|
||
|
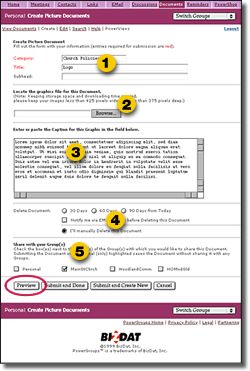
B.
Fill in the Create Picture Document Form |
 |
|
|
|
||
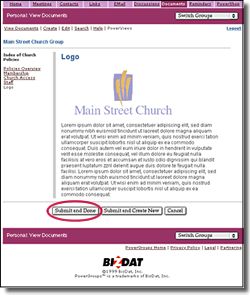
| C.
Review your Document Looks great! Click the Submit button, and you're done. Note the links on the left side of the page; PowerGroups automatically creates links between documents in the same Category. This feature comes in handy when you're creating manuals, sell sheets, photo albums and similar documents you'd like linked together. |
 |
|
